JavaScipt can do a lot more than just work in the browser. With the help of Node it can be used to build powerful command line tools. I recently created my own CLI to speed up repetitive tasks at work. The project we build in this article be a small portion of that and will do a lot more than print "Hello World".
If you don't have Node installed on your local machine download it HERE.
Option 1 - Clone Source Code
Download the zip or better yet clone the source code to your local machine.
git clone https://github.com/benjaminadk/node-cli-tutorial.gitOption 2 - Build From Scratch
If you want to code along with me and build from scratch just continue reading.
The first thing needed is a folder to store your project code in.
mkdir node-cli
cd node-cli
Lets initialize this folder as an NPM project and create a file to write some code in. NPM stands for Node Package Manager, by the way. Check out NPM.
npm init -y
touch index.js
If any of the instructions above were unfamiliar or didn't work you might want to do some googling now and learn more about Node, NPM and the command line in general.
Now would be a good time to clue everyone in one what this application is actually going to do.
Drum roll please. 🥁
We are going to make thumbnail images. More specifically, we will be able to navigate to a directory full of images via the command line, invoke our command, and create a new directory full of thumbnails. Of course, tasks like this can be accomplished with Photoshop and other image manipulation software, but we are programmers and we want to make our own. In this use case we will be making 225x190 pixel thumbnails from 800x800 textile images and saving them as 40% quality JPEGs. To help make this super easy we will use a package called Jimp. While we are downloading stuff lets get Commander and rimraf as well. Commander is a helpful framework for command line apps and rimraf is a file system utility to help us delete a directory and its contents programmatically.
Make sure you are in the project directory aka the same level as package.json aka the root.
npm install jimp commander rimrafTo make sure everything is working correctly, add a little code to index.js.
console.log('Hello World')And we're done! 😎. Just kidding. This is just to make sure Node is working. I try to write tutorials that beginners can follow. From inside our node-cli directory we can now run the following.
node ./index.jsQuick tip. index.js is recognized as a sort of default filename in Node. This works as well.
node .You should see Hello World printed in the terminal.
This is how JavaScript files are executed by the Node interpreter. However, the goal of this exercise is to make a command line tool. We want to be able to type a command anywhere on our computer and have our code execute.
First add the following line to the top of index.js. Understanding this line isn't important right now. It uses a Shebang - #! - and instructs the system to use Node to interpret this file. This is required when building command line applications with NPM.
#!/usr/bin/env node
console.log('Hello World')
The package.json file also needs to be updated. The important lines are highlighted. This bin key is telling NPM that when we type make-thumbs on the command line we want to run index.js. I named it make-thumbs just to avoid any conflicts with node-cli, but this can be named anything really. The corresponds to the text typed into the command prompt to execute our app. Common commands include cd, ls, curl, mkdir, and tons more. When these commands are entered there is actually code running somewhere behind the scenes.
{
"name": "node-cli",
"version": "1.0.0",
"description": "Command line tutorial",
"main": "index.js",
"bin": { "make-thumbs": "./index.js" }, "scripts": {
"test": "echo \"Error: no test specified\" && exit 1"
},
"keywords": [],
"author": {
"name": "benjaminadk",
"email": "benjaminadk@gmail.com",
"url": "https://github.com/benjaminadk"
},
"license": "ISC",
"dependencies": {
"commander": "4.1.0",
"jimp": "0.9.3"
}
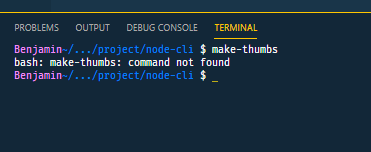
}Now type make-thumbs in the command line. It should throw and error something like what you see below.
There is one more step to wire the global command to work on our system. Make sure you are in the root of the project.
npm linkThis should trigger the following output. NPM is working magic behind the scenes.

Try typing make-thumbs in the command line one more time.
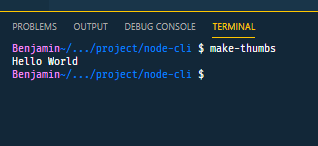
Tada! 😁
Note that this link can be undone via npm unlink. On a Windows machine you can check "~\AppData\Roaming\npm to see that NPM has created a .cmd file corresponding to the command name. ~ refers to C:\Users\your-user-name aka the HOME directory. This information is not crucial but nice to know.
Now this project is setup and we can add some useful code.
#!/usr/bin/env node

const program = require('commander')

program
  .version('1.0.0')
  .name('make-thumbs')
  .description('An image resizer to make thumbnails')
  .option('-s,--source [folder]', 'Source images directory', 'images')
  .option(
    '-d,--destination [folder]',
    'Directory to be created for thumbnails',
    'thumbnails'
  )
  .parse(process.argv)
Commander is a great framework and helps to set up options and produces help menus automatically. Here I am assigning a version, name and description, as well as some options. Finally, we are parsing process.argv. These are the arguments provided to the command. With just this code we already have a working command line tool.
make-thumbs --help
The options allow the input of a directory of source images and a directory to save the new thumbnails. These are relative to the current working directory and not absolute paths. I have created aliases -s, normal options - --source, descriptions and defaults. Now the filesystem and image manipulation logic can be added.
I want to create a separate folder and file to hold some of this logic to keep things organized and modular.
mkdir lib
cd lib
touch index.js
I want to take advantage of Async/Await code so I am using promisify. These utilities help to read directories, make directories, remove directories and check if directories exist. Consult the Node documentation for more information on these. I have also including the Jimp logic to create a thumbnail to our specs. Consult their documentation more information.
const jimp = require('jimp')
const rimraf = require('rimraf')

const fs = require('fs')
const { promisify } = require('util')

const thumbnail = async (src, dest) => {
  const image = await jimp.read(src)
  await image.resize(225, 190, jimp.RESIZE_BICUBIC)
  image.quality(40)
  await image.writeAsync(dest)
}

const directoryExists = filepath => {
  return fs.existsSync(filepath)
}

const readdir = promisify(fs.readdir)
const mkdir = promisify(fs.mkdir)
const rm = promisify(rimraf)

module.exports = {
  thumbnail,
  directoryExists,
  readdir,
  mkdir,
  rm
}
Here is the finished code for index.js with our utilities imported.
#!/usr/bin/env node

const program = require('commander')
const path = require('path')

const { thumbnail, directoryExists, readdir, mkdir, rm } = require('./lib')

program
  .version('1.0.0')
  .name('make-thumbs')
  .description('An image resizer to make thumbnails')
  .option('-s,--source [folder]', 'Source images directory', 'images')
  .option(
    '-d,--destination [folder]',
    'Directory to be created for thumbnails',
    'thumbnails'
  )
  .parse(process.argv)

const main = async () => {
  try {
    // Use current working dir vs __dirname where this code lives
    const cwd = process.cwd()

    // Use user input or default options
    const { source, destination } = program
    const srcPath = path.join(cwd, source)
    const destPath = path.join(cwd, destination)

    // Remove destination directory is it exists
    if (directoryExists(destPath)) {
      await rm(destPath)
    }

    // Create destination directory
    await mkdir(destPath)

    // Read source directory
    const imagesAll = await readdir(srcPath)

    // Create thumbnails
    for (let image of imagesAll) {
      const src = path.join(srcPath, image)
      const dest = path.join(destPath, image)
      console.log(`Creating thumbnail at: ${dest}`)
      thumbnail(src, dest)
    }

    console.log('Thumbnails created successfully!')
  } catch (error) {
    console.log('Error creating thumbnails.')
  }
}

main()
All of our logic is placed inside the main function which is executed at the bottom of the code. Within main there is a try/catch block. This is helpful to control any error messages that may occur. With this structure the message inside the catch block is all the user will see if there is an error. This can be customized to any message desired, including part or all of the actual error thrown. In development you can simply log the error here to troubleshoot.
One important aspect is the use of process.cwd(). This command line application works based on the directory level the user is located in. This is used to create the paths to the source and destination folders. The destination folder is deleted and created again if it exists. Then the contents of the source directory are read into memory. Finally, these files are looped over and a thumbnail is created for each image and saved into the destination folder. I added some logs to give a sense of the program working. These can be removed or even replaced with some sort of progress logic. It is all up to you!
To make sure everything is working I have included a test directory in the source files. To test functionality do the following.
cd test
make-thumbs
Everything should be working! I made a quick video to demonstate the application in action.